

Checkboxes are a powerful feature in Microsoft Word, allowing users to create interactive lists, forms, and checklists. For instance, a technical writer might use checkboxes in a user manual for creating a step-by-step troubleshooting checklist. This would allow the readers to check off each step as they go through the steps toward the resolution of an issue. Such a method enhances clarity and minimizes errors while making the document more interactive and user-friendly.
Today’s article will explain, in a step-by-step manner, how to insert checkboxes into Word documents intended for both digital use and printing, how to add a checkmark symbol, how to make an active checklist using the Developer tab, how to customize checkboxes for usage in printed forms, and provide useful tips to build the most understandable and user-friendly checklist or form.
Why Use a Checkbox in Word
A checkbox in Word makes your document interactive and easier to use. It allows users to mark items as complete, select options, or fill out forms directly within the file. This is particularly useful when tracking business, training, or personal documents is required.
A project manager may insert checkboxes into a Word document to track 15 key tasks related to a product launch, enabling the team to visually check off each item as it is completed. In training, instructors can create interactive quizzes in which checkboxes are provided for multiple-choice answers, making response collection and grading more manageable.
Working without checkboxes in Word makes tracking progress and collecting answers more difficult. Without a clear visual indicator like a checkmark, it’s easier to overlook completed tasks, especially in long documents or ones shared by multiple people.
Who Uses Checkboxes in Microsoft Word
Checkboxes are widely used by professionals, educators, and students.
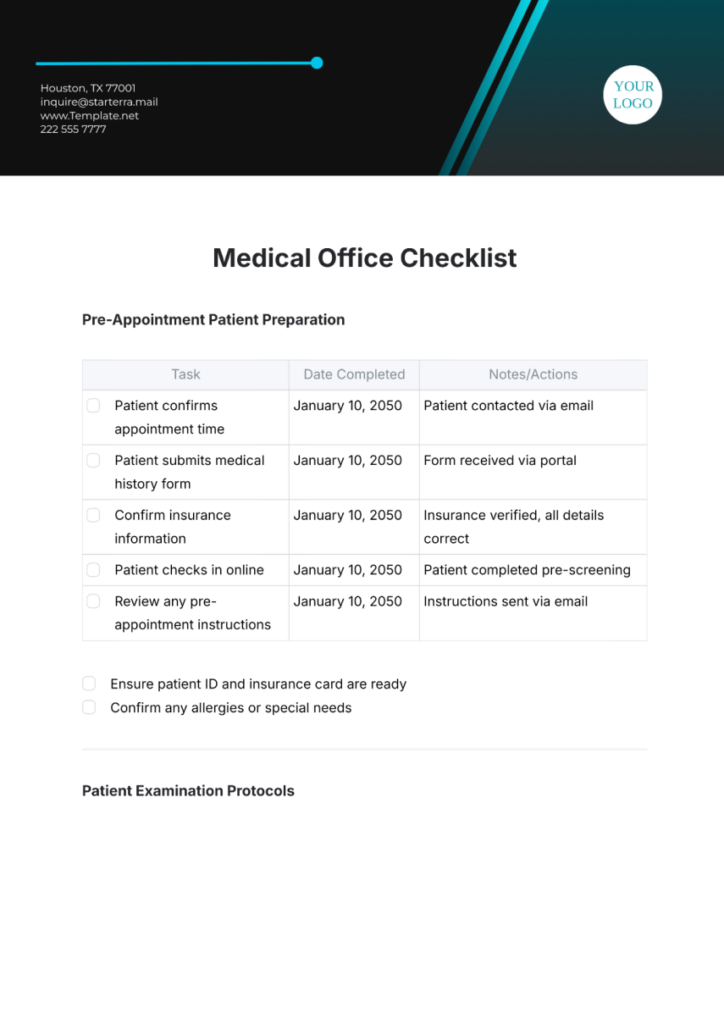
In medical offices, checkboxes help ensure each step of the intake process is completed—insurance verification, consent forms, emergency contact updates, etc.
In construction, site supervisors use checkboxes for daily safety checklists addressing equipment inspection, hazard identification, and compliance with safety rules.

In education, teachers use checkboxes when assessing students through rubrics with criteria such as grammar, structure, and content.
In IT departments, technicians follow checklists during server maintenance, updates, and audits.

These examples show how checkboxes help users across fields organize, track, and complete critical tasks efficiently.
Types of Checkboxes in Word
Microsoft Word offers two main types of checkboxes:
Interactive (Content Control) Checkboxes
These checkboxes are clickable and can be toggled directly in the document. You can customize the appearance (for example, changing the checkmark symbol) using the Developer tab. The default symbol is an X, but you can change it to a tick or other symbols using fonts like Wingdings or Segoe UI Symbol.
Legacy Checkboxes (Form Fields)
These older controls are also available through the Developer tab and are often used in structured or printed forms. They work well for documents that need protection or for offline usage.
Note: In some versions of Word for Mac, legacy checkboxes may not be available in the same form as on Windows.
Choosing the right type depends on your document’s purpose and the desired interaction.
How to Insert a Checkbox in Word
To insert a checkbox in Word (Windows), follow these steps:
1. Place your cursor where you want the checkbox.
2. Click on the Developer tab in the ribbon. If you don’t see it, go to File > Options > Customize Ribbon and check the Developer box.
3. In the Controls group, click the checkbox icon (a white box with a blue checkmark).
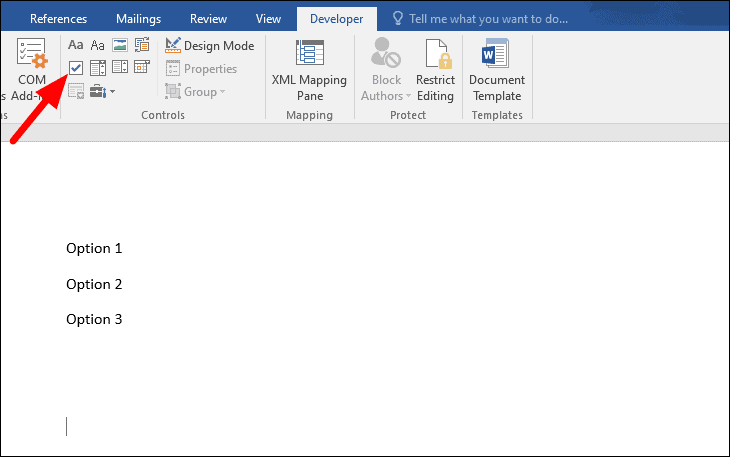
A checkbox will appear at your cursor location. You can copy and paste it to add more checkboxes.
How to Add a Checkbox in Word on Mac
This clarifies Mac-specific functionality, which varies from Windows.
- Open your document.
- Go to Word > Preferences.
- Select Ribbon & Toolbar and enable the Developer tab.
- To insert a clickable checkbox, go to Developer > Controls and choose Checkbox.
- To insert a checkmark symbol, go to Insert > Symbol and choose a checkmark from Wingdings or Segoe UI Symbol.
Note: Some older Mac versions do not include legacy checkbox tools.
Convert Bullet Points to Checkboxes
You can also convert bullet points into checkboxes:
1. Select your bullet list.
2. Click the Bullets dropdown icon.
3. Choose Define New Bullet.
4. Select Symbol, choose the checkbox or checkmark symbol, and click OK.

Add a Checkbox with Word Developer Tools
For more advanced forms, use the Developer tools:
1. Enable the Developer tab (if not already visible).
2. Place your cursor where you want the checkbox.
3. Go to Developer > Controls > Legacy Tools > Check Box Form Field.
4. The checkbox will appear and can be copied and pasted as needed.

Use Cases: When Would You Add a Checkbox in Word
Checkboxes in Word are widely used for practical and interactive documents. Here are some real-life examples and figures to illustrate their value:
- Creating to-do lists and checklists. Teams can track 10–20 tasks with clear visual status through updates with checkmarks.
- Designing forms and surveys. HR departments add 20–30 checkboxes in onboarding forms to streamline data collection.
- Tracking project progress. Construction companies reduce safety mistakes by up to 25% with daily inspection checklists.
- Collecting answers in quizzes or training materials. Teachers create multiple-choice tasks with 10–20 questions using checkboxes for faster grading.
- Making interactive documents for business or education. Universities build interactive orientation checklists to guide students through the process.
By using checkboxes, organizations and individuals can create more efficient, error-free, and interactive documents for a wide range of tasks.
ClickHelp Methods for Building Checklists
ClickHelp doesn’t include built-in checkbox controls like Microsoft Word, but you can still add interactive checklist elements using simple HTML and CSS. This approach works well for tasks, forms, and any documentation that needs checkable items.
Add a Checkbox with HTML
The easiest way to include a checkbox in your topic is to use a standard HTML input element:
<input type=”checkbox”> Task 1
<input type=”checkbox” checked> Task 2 (completed)

These checkboxes are clickable right inside the document and behave like regular form controls in a browser.
Add a Checkmark
If you only need a visual checkmark rather than an interactive box, you can insert a Unicode character such as:
✓ Completed
✗ Not completed
You can also style the checkmark using CSS if you want it to match your project’s design.
Styling Checkboxes
You can customize the appearance of your checkboxes with CSS—adjusting size, spacing, color, or replacing the default browser checkmark with a custom symbol. This gives you flexibility to create clean, consistent, and visually appealing checklists inside ClickHelp.
Tickled Tasks: Your Checkbox Mastery Checklist
Congratulations! You’ve just leveled up your Word skills. Here’s a checklist to tick off your newfound powers. Get ready to impress your colleagues.
Checklist:
✅ Enable the Developer Tab: You can now summon the Developer tab like a wizard, unlocking the secret powers of Word’s advanced controls.
✅ Insert Interactive Checkboxes: You know how to add clickable checkboxes that respond to your actions.
✅ Customize Checkbox Appearance: You can style your checkboxes with different symbols, fonts, and colors — even your checkmarks get a makeover.
✅ Convert Bullet Points to Checkboxes: You can style your checkboxes with different symbols, fonts, and colors — even your checkmarks get a makeover.
✅ Use Legacy Checkboxes: You understand how to add old-school form fields for printed documents.
✅ Create and Format Checklists: You’re able to build checklists for any use case — business, HR, education, or IT.
✅ Track Progress and Collect Answers: You can use checkboxes to follow completion status and gather responses.
✅ Copy and Paste Checkboxes: You can duplicate checkboxes quickly to format lists faster.
✅ Review and Test Checklists: You double-check that every checkbox works as intended, avoiding confusion for your readers.
✅ Apply Skills to Real-World Scenarios: You’re ready to use checkboxes across projects, documents, and workflows to stay organized.
By mastering these skills, you can create more effective, interactive, and user-friendly documents in Microsoft Word.
Conclusion
By using checkboxes in Word, you can make your documents more interactive and user-friendly, whether you’re creating a simple checklist or a complex form. These steps will help you track tasks, collect responses, organize information, and use checkmark symbols effectively.
For IT professionals, checkboxes are especially useful for system maintenance checklists, audit forms, and compliance documentation.
In ClickHelp, similar interactive elements can be created with custom HTML/JavaScript or external integrations, making your documentation more dynamic and helpful.
Good luck with your technical writing!
Author, host and deliver documentation across platforms and devices.
FAQ
Can I make checkboxes clickable in Word?
Yes. To create interactive checkboxes, enable the Developer tab and insert a Content Control Checkbox. These checkboxes can be clicked directly inside the document.
What if I don’t see the Developer tab?
Go to File > Options > Customize Ribbon, check the box next to Developer, and save your changes. The tab will appear in the ribbon.
Can I use checkboxes in Word for Mac?
Yes, but the tools may differ slightly from the Windows version. You can insert interactive checkboxes through Developer > Controls, and add checkmark symbols through Insert > Symbol.
Can I convert bullet points into checkboxes?
Yes. Use Bullets > Define New Bullet > Symbol and choose a checkbox or checkmark symbol to turn a bullet list into a checklist.
Why are my checkboxes not printing correctly?
If using interactive checkboxes, ensure the font supports the selected checkmark symbol. For printed forms, legacy checkboxes or symbol-based checkboxes usually print more consistently.
Can I customize how checkboxes look?
Yes. You can change the checkmark symbol, adjust formatting, or use different fonts like Wingdings and Segoe UI Symbol to achieve the desired appearance.
Can I copy and paste checkboxes to speed up formatting?
Yes. Once you’ve inserted one checkbox, you can duplicate it as many times as needed using copy and paste.