

Adding a line in Microsoft Word is a simple way to visually separate sections, improve a document layout, or highlight important information. Whether you want a horizontal or vertical line, Word offers several methods to help you insert lines quickly and efficiently. This guide will show you how to add lines using the keyboard, ribbon, borders, and shapes — and will also share how to do the same in ClickHelp. If you want more control, you can follow the steps below and choose the method that works best for your document.
The Impact of a Line: How a Simple Line Influences Readability, UX, and SEO Parameters
A tech writer or copyeditor often needs to insert a horizontal line in Word when organizing a document, such as separating sections in a user manual, dividing content in a report, or marking a change in topics. For example, when creating a step-by-step guide, a horizontal line can clearly separate each major step, making the page easier to read and follow. This helps readers quickly identify transitions between sections and improves clarity.
Impact on Readability
A horizontal line significantly improves readability by creating clear visual breaks. Research shows that structured content with separators helps readers process information faster, reducing eye strain and confusion. Readers are much less likely to skip important information when the text is visually divided into blocks. Proper spacing and separators can reduce missed content by up to 30%.
Impact on UX
Horizontal lines also influence usability. Clear visual separation can increase engagement by up to 35%, improving scanning and navigation. Well-placed lines help guide attention, reduce cognitive load, and make content feel organized. Poor structure, on the other hand, increases the time users spend searching for information and lowers satisfaction.
Impact on SEO
Lines (including the HTML <hr> tag) help provide semantic structure. While they are not a direct ranking factor, they make content more scannable for both readers and search engines. Clear divisions reduce bounce rates, improve flow, and support stronger topical relevance — all of which indirectly help SEO.
Example:
<p>Introduction</p>
<hr>
<p>Main section with key points</p>
<hr>
<p>Conclusion</p>
This structure helps search engines understand where one idea ends and another begins, making indexing more accurate.
How to Insert a Horizontal Line in Word
Using the Keyboard
The fastest way to insert a horizontal line in Word is by typing three characters and pressing Enter. Word’s AutoCorrect converts them into a formatted line:
- — creates a solid line
- ___ creates a thick line
- === creates a double line
- *** creates a dotted line
- ~~~ creates a wavy line
This method is quick, requires no buttons, and does not depend on ribbon navigation.
Using the Ribbon
- Place your cursor where you want the line.
- Go to the Home tab.
- Click the Borders button in the Paragraph group.
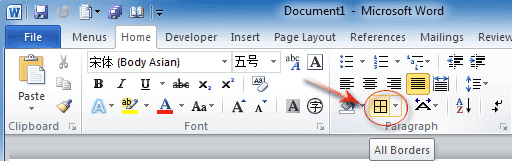
- Then select Horizontal Line.
This inserts a customizable separator that you can modify with more formatting options.
Using Borders
- Place your cursor on a blank line.
- Open the Home tab.
- Click the Borders dropdown.
- Choose Horizontal Line.

If you want to add structure to a specific paragraph or block, this method gives you better placement control.
Using Shapes
- Go to the Insert tab.
- Click Shapes in the Illustrations group.
- Select the Line shape.
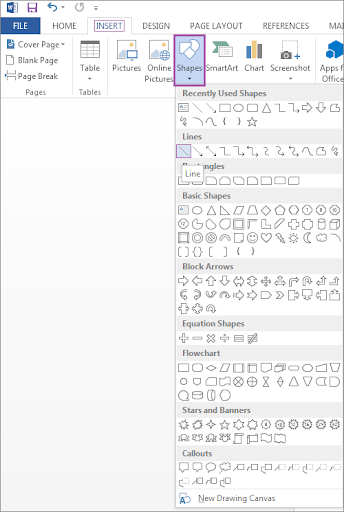
- Click and drag your mouse to draw the line.
This method is helpful when you want more customization — color, thickness, style, alignment, and more.
How to Insert a Vertical Line in Word
Using a Bar Tab
- Place your cursor where you want the vertical line.
- Go to the Home tab.
- Click the small Paragraph dialog launcher.
- In the dialog box, select Tabs.
- Enter a position, choose Bar, and click Set.
- Then click OK.
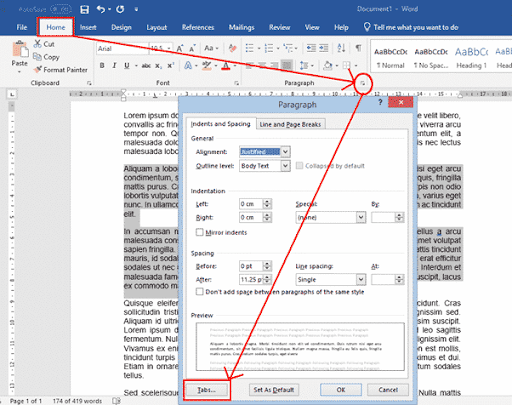
Pressing Tab will insert a vertical bar at the defined position.
Using Borders
- Highlight the text or paragraph.
- Navigate to the Home tab.
- Open the Borders dropdown.
- Select Left Border or Right Border.
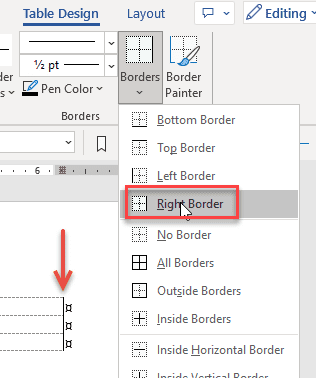
This adds a vertical line next to the selected content. This method is simple and does not require drawing tools.
Using Shapes
- Go to the Insert tab.
- Select Shapes.
- Choose the Line tool.
- Hold Shift and drag to draw a straight vertical line.

This gives you full control over shape, placement, and formatting.
How to Add Lines in ClickHelp
ClickHelp is a versatile documentation platform designed to help teams create, organize, and publish professional user manuals, help guides, and knowledge bases. Just like in Word or other editors, adding horizontal and vertical lines in ClickHelp is essential for improving content organization and readability. Here’s how to do it in detail:
Adding Horizontal Lines
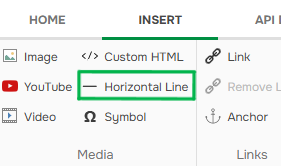
- Using the Insert Tab: In the ClickHelp Advanced Topic Editor, place your cursor where you want to add a horizontal line. Switch to the Insert tab on the ribbon. In the corresponding section, click the Horizontal Line button. This inserts a clean horizontal line that visually separates content blocks and improves scan readability.
- Using HTML: If you prefer, you can directly insert HTML code in the editor to add horizontal lines. For example, typing <hr> in HTML mode creates a horizontal rule. This method gives you more control over the line’s placement and can be combined with custom CSS styling if needed.
Adding Vertical Lines
- Using Custom HTML: For advanced users, vertical lines can be added using custom HTML embedded in the editor. For example, applying a left or right border to a container element—with a defined height and color—creates a consistent vertical line effect across pages.
Example:<div style="border-left: 2px solid #000; height: 100px;"></div> - (Optional) Using Tables: For users who prefer not to work with HTML, vertical separators can also be created using table cell borders. Adjusting the left or right border of a table column is an easy way to add vertical lines through the ClickHelp UI without coding.
Using these methods to insert lines ensures your documentation is clean, professional, and easier to follow, which crucially supports user education and satisfaction.
Conclusion
Adding a line in Word or ClickHelp is simple and can be done in several ways. Whether you want to insert a horizontal or vertical line, use the keyboard, ribbon, borders, or shapes to achieve the desired effect. These methods help you organize your document and make it more visually appealing. If you need more advanced formatting, both Word and ClickHelp offer additional options for customization.
Good luck with your technical writing!
Author, host and deliver documentation across platforms and devices
FAQ
How do I add a simple horizontal line in Word?
The fastest way is to use AutoCorrect shortcuts. Type three characters (—, ___, ***, ===, ~~~) and press Enter — Word will automatically convert them into a formatted horizontal line.
How can I customize the appearance of a horizontal line?
Insert a line through Home → Borders → Horizontal Line, then right-click the line and choose Format Horizontal Line. You can change width, height, color, and alignment.
My vertical line in Word is not straight. What should I do?
Hold Shift while drawing the line using Insert → Shapes → Line. This locks the line to a perfect 90° angle.
Can I add a line next to only one paragraph?
Yes. Highlight the paragraph and use Home → Borders → Left Border or Right Border. This applies the line only to the selected block of text.
Does adding lines affect document SEO?
Indirectly, yes. Lines improve readability, reduce bounce rate, and clarify content structure, which helps search engines better interpret your document if published as HTML.
Why use lines at all?
Lines improve readability, guide user attention, reduce cognitive load, and visually structure content — especially in long technical documents.